공부 내용을 정리하고 앞으로의 학습에 이해를 돕기 위해 작성합니다.

HTTP 요청 파라미터 - 쿼리 파라미터, HTML Form
HTTP 요청 데이터 조회 - 개요
서블릿에서 학습했던 HTTP 요청 데이터를 조회하는 방법을 다시 떠올려보자. 그리고 스프링이 이를 얼마나 깔끔하고 효율적으로 바꾸어주는지 알아보자.
클라이언트에서 서버로 데이터를 전달하는 방법은 크게 세 가지가 있다.
클라이언트에서 서버로 요청 데이터를 전달하는 3가지 방법
1. GET - 쿼리 파라미터
- 예시: /url?username=hello&age=20
- 메시지 바디 없이, URL의 쿼리 파라미터를 통해 데이터를 포함하여 전달한다.
- 주로 검색, 필터, 페이징 등의 기능에서 사용된다.
2. POST - HTML Form
- content-type: application/x-www-form-urlencoded
- 메시지 바디에 username=hello&age=20 같은 쿼리 파라미터 형식으로 데이터를 전달한다.
- 주로 회원 가입, 상품 주문과 같은 HTML Form을 사용할 때 사용된다.
3. HTTP message body에 데이터를 직접 담아 요청
- HTTP API에서 주로 사용되며, JSON, XML, TEXT 등의 형식으로 데이터를 전달한다.
- 보통 POST, PUT, PATCH 메서드에서 활용된다.
- 데이터 형식으로는 주로 JSON을 사용한다.
요청 파라미터 조회 - 쿼리 파라미터, HTML Form
서블릿에서 제공하는 HttpServletRequest 의 request.getParameter()를 사용하면 다음 두 가지 요청 파라미터를 조회할 수 있다.
1. GET 요청 시, 쿼리 파라미터 전송
http://localhost:8080/request-param?username=hello&age=20
2. POST 요청 시, HTML Form 전송
POST /request-param HTTP/1.1
Host: localhost:8080
Content-Type: application/x-www-form-urlencoded
Content-Length: 24

username=hello&age=20
GET 방식과 POST 방식 모두 동일한 형식(key=value&key=value)을 사용하므로, request.getParameter()를 이용하면 둘 다 같은 방식으로 조회할 수 있다.
이러한 요청 데이터를 조회하는 것을 요청 파라미터(request parameter) 조회라고 한다.
이제부터 스프링에서 요청 파라미터를 조회하는 방법을 살펴보자.
스프링에서 요청 파라미터 조회 - RequestParamController
아래 코드는 HttpServletRequest를 사용하여 요청 파라미터를 조회하는 기본적인 방법이다.
package hello.springmvc.basic.request;

import lombok.extern.slf4j.Slf4j;
import org.springframework.stereotype.Controller;
import org.springframework.web.bind.annotation.RequestMapping;

import javax.servlet.http.HttpServletRequest;
import javax.servlet.http.HttpServletResponse;
import java.io.IOException;

@Slf4j
@Controller
public class RequestParamController {

    /**
     * 반환 타입이 없으면서 응답에 값을 직접 넣으면, View 조회가 수행되지 않는다.
     */
    @RequestMapping("/request-param-v1")
    public void requestParamV1(HttpServletRequest request, HttpServletResponse response) throws IOException {
        String username = request.getParameter("username");
        int age = Integer.parseInt(request.getParameter("age"));

        log.info("username={}, age={}", username, age);
        response.getWriter().write("ok");
    }
}
request.getParameter() 사용 방식
위 코드에서 request.getParameter("username")을 이용하여 요청 데이터를 조회할 수 있다.
GET 요청 실행 예시
아래 URL을 통해 GET 요청을 실행할 수 있다.
http://localhost:8080/request-param-v1?username=hello&age=20
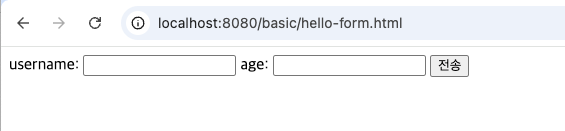
POST 요청을 위한 HTML Form
테스트를 위해 간단한 HTML Form을 만들어 보자.
스프링 부트에서는 resources/static 경로에 정적 리소스를 두면 자동으로 제공된다.
파일 위치: main/resources/static/basic/hello-form.html
<!DOCTYPE html>
<html lang="ko">
<head>
    <meta charset="UTF-8">
    <title>Form Test</title>
</head>
<body>
    <form action="/request-param-v1" method="post">
        username: <input type="text" name="username" />
        age: <input type="text" name="age" />
        <button type="submit">전송</button>
    </form>
</body>
</html>
POST 요청 실행 예시
위 HTML 파일을 브라우저에서 열고 데이터를 입력한 후 전송하면, /request-param-v1로 POST 요청이 전송된다.
참고 사항
- Jar 패키징을 사용할 경우 webapp 경로를 사용할 수 없다.
- 따라서 정적 리소스를 src/main/resources/static 경로에 두어야 한다.
HTTP 요청 파라미터 - @RequestParam
스프링이 제공하는 @RequestParam을 사용하면 요청 파라미터를 매우 편리하게 사용할 수 있다.
requestParamV2
/**
* @RequestParam 사용
* - 파라미터 이름으로 바인딩
* @ResponseBody 추가
* - View 조회를 무시하고, HTTP message body에 직접 해당 내용 입력
*/
@ResponseBody
@RequestMapping("/request-param-v2")
public String requestParamV2(
    @RequestParam("username") String memberName,
    @RequestParam("age") int memberAge) {
    log.info("username={}, age={}", memberName, memberAge);
    return "ok";
}- @RequestParam : 파라미터 이름으로 바인딩
- @ResponseBody : View 조회를 무시하고, HTTP message body에 직접 해당 내용 입력
- @RequestParam("username")은 request.getParameter("username")과 동일하다.
requestParamV3
/**
* @RequestParam 사용
* HTTP 파라미터 이름이 변수 이름과 같으면 @RequestParam 생략 가능
*/
@ResponseBody
@RequestMapping("/request-param-v3")
public String requestParamV3(
    @RequestParam String username,
    @RequestParam int age) {
    log.info("username={}, age={}", username, age);
    return "ok";
}- HTTP 파라미터 이름이 변수 이름과 같으면 @RequestParam(name="xx")을 생략할 수 있다.
requestParamV4
/**
* @RequestParam 사용
* String, int 등의 단순 타입이면 @RequestParam도 생략 가능
*/
@ResponseBody
@RequestMapping("/request-param-v4")
public String requestParamV4(String username, int age) {
    log.info("username={}, age={}", username, age);
    return "ok";
}- String, int, Integer 등의 단순 타입이면 @RequestParam을 생략할 수 있다.
- 하지만 명확성을 위해 @RequestParam을 사용하는 것이 좋다.
스프링 부트 3.2 파라미터 이름 인식 문제
스프링 부트 3.2부터 @RequestParam 또는 @PathVariable에서 이름을 생략할 경우, -parameters 옵션이 필요하다.
발생하는 예외
java.lang.IllegalArgumentException: Name for argument of type [java.lang.String]
not specified, and parameter name information not found in class file either.
해결 방안
1. 애노테이션에 이름을 명시적으로 지정한다. (권장)
@RequestParam("username") String username
@PathVariable("userId") String userId
2. 컴파일 시 -parameters 옵션 적용
- IntelliJ IDEA: File > Settings > Build, Execution, Deployment > Compiler > Java Compiler에서 -parameters 추가
- out 폴더 삭제 후 재실행 필요
3. Gradle 빌드 사용 (Gradle은 -parameters 옵션을 자동 적용)
파라미터 필수 여부 - requestParamRequired
/**
* @RequestParam.required
* 기본값이 true이므로 필수 입력값
*/
@ResponseBody
@RequestMapping("/request-param-required")
public String requestParamRequired(
    @RequestParam(required = true) String username,
    @RequestParam(required = false) Integer age) {
    log.info("username={}, age={}", username, age);
    return "ok";
}- @RequestParam(required = true): 필수값이므로 username이 없으면 400 예외 발생
- @RequestParam(required = false): null 허용
- int age는 null을 받을 수 없어 Integer로 변경해야 한다.
기본 값 적용 - requestParamDefault
/**
* @RequestParam defaultValue 사용
*/
@ResponseBody
@RequestMapping("/request-param-default")
public String requestParamDefault(
    @RequestParam(defaultValue = "guest") String username,
    @RequestParam(defaultValue = "-1") int age) {
    log.info("username={}, age={}", username, age);
    return "ok";
}- defaultValue를 사용하면 기본값이 설정되므로 required는 의미가 없다.
- 빈 문자열(username=)도 기본값으로 대체된다.
파라미터를 Map으로 조회 - requestParamMap
/**
* @RequestParam Map, MultiValueMap 사용
*/
@ResponseBody
@RequestMapping("/request-param-map")
public String requestParamMap(@RequestParam Map<String, Object> paramMap) {
    log.info("username={}, age={}", paramMap.get("username"), paramMap.get("age"));
    return "ok";
}- @RequestParam Map을 사용하면 파라미터를 key-value 형태로 조회 가능
- MultiValueMap<String, List<String>>을 사용하면 하나의 키에 여러 값을 받을 수 있다.
- 값이 하나인 경우 Map을 사용하고, 여러 개일 경우 MultiValueMap을 사용한다.
HTTP 요청 파라미터 - @ModelAttribute
실제 개발에서는 요청 파라미터를 받아서 객체를 만들고 값을 설정하는 과정을 거친다. 일반적으로 다음과 같은 방식으로 작성한다.
@RequestParam String username;
@RequestParam int age;
HelloData data = new HelloData();
data.setUsername(username);
data.setAge(age);
스프링은 이러한 과정을 자동화하는 @ModelAttribute 기능을 제공한다.
HelloData 클래스
package hello.springmvc.basic;

import lombok.Data;

@Data
public class HelloData {
    private String username;
    private int age;
}- @Data : @Getter, @Setter, @ToString, @EqualsAndHashCode, @RequiredArgsConstructor 자동 적용
@ModelAttribute 적용 - modelAttributeV1
/**
* @ModelAttribute 사용
* 요청 파라미터를 객체에 자동 바인딩
*/
@ResponseBody
@RequestMapping("/model-attribute-v1")
public String modelAttributeV1(@ModelAttribute HelloData helloData) {
    log.info("username={}, age={}", helloData.getUsername(), helloData.getAge());
    return "ok";
}- HelloData 객체가 자동 생성되고, 요청 파라미터가 해당 객체의 프로퍼티에 매핑된다.
- 스프링 MVC는 @ModelAttribute가 있으면 다음 과정을 수행한다.
- HelloData 객체 생성
- 요청 파라미터 이름을 HelloData 객체의 프로퍼티와 매칭
- 해당 프로퍼티의 setter를 호출하여 값 설정
- 예) 파라미터 username이 setUsername() 메서드에 자동으로 매핑된다.
@ModelAttribute 생략 - modelAttributeV2
/**
* @ModelAttribute 생략 가능
* 단순 타입(String, int 등)은 @RequestParam 적용
* 나머지는 @ModelAttribute 적용
*/
@ResponseBody
@RequestMapping("/model-attribute-v2")
public String modelAttributeV2(HelloData helloData) {
    log.info("username={}, age={}", helloData.getUsername(), helloData.getAge());
    return "ok";
}- @ModelAttribute는 생략 가능하다.
- 하지만 @RequestParam도 생략 가능하기 때문에 혼란이 발생할 수 있다.
- 스프링의 규칙
- String, int, Integer 등의 단순 타입 → @RequestParam 적용
- 그 외 객체 타입 → @ModelAttribute 적용
바인딩 오류 처리
- age=abc처럼 숫자 타입에 문자열을 넣으면 BindException 발생한다.
- 바인딩 오류는 검증 단계에서 처리 가능
참고
- argument resolver가 적용된 타입은 @ModelAttribute가 아닌 다른 방식으로 처리된다. (추후 학습)
'Spring MVC' 카테고리의 다른 글
| [MVC] 스프링 MVC - 기본 기능(4) (0) | 2025.03.06 |
|---|---|
| [MVC] 스프링 MVC - 기본 기능(2) (1) | 2025.02.24 |
| [MVC] 스프링 MVC - 기본 기능(1) (0) | 2025.02.23 |
| [MVC] 스프링 MVC - 구조 이해(3) (1) | 2025.02.22 |
| [MVC] 스프링 MVC - 구조 이해(2) (0) | 2025.02.20 |


